Find your beads, strings, and stones in a flash with these tips.
Imagine yourself getting hit by a burst of inspiration for a new jewelry design. Excitedly, you rush to sketch your idea, and feeling pleased with yourself you decide to make it right then and there. Alas, you couldn’t find any of the materials you need!
While this is a frustrating scenario, it is not exactly unheard of. Indeed, it is very easy to lose track of things if you don’t have a system for organizing your tools and supplies in the first place. While having a neat and well-designed jewelry display is important to any jewelry business, it all starts with the creative process, and creating jewelry begins with having all the essentials ready and in place. A functional workspace where every tool and material that’s needed are where they should be is important; when everything is neat and organized jewelry makers are a lot more calm and able to focus on their work on hand.
If you need a few tips about this particular topic then stay put and let this article be your guide.
1. Group things that belong together.
Organizing your jewelry workspace begins by grouping things that belong together. The tools you use such as pliers and cutters should be gathered together and placed in one container, for example in a toolbox with several compartments. Meanwhile, jewelry parts such as stringing materials should be gathered and further sorted depending on their type. Likewise, you will find yourself not just working with wires and stringing materials but also beads, stones, and crystals. They could then be further subdivided into kind, appearance, and color to make it easier for you to find them once you start working on your project.
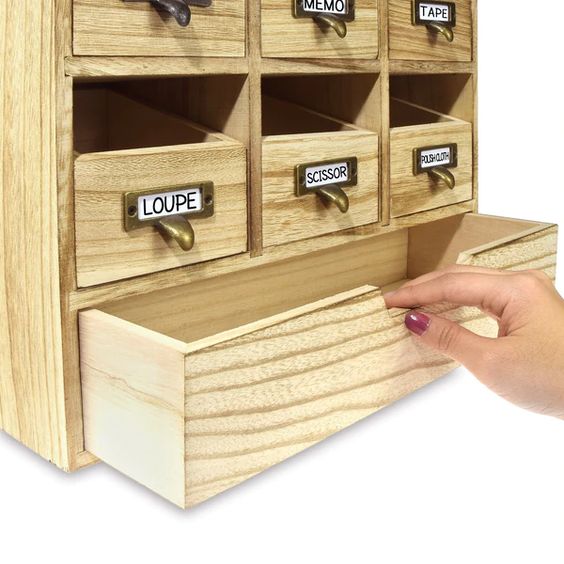 |
| #HOM331 Wooden Desktop Drawers & Craft Supplies Storage Cabinet* |
2. Label everything for easy finding and identification purposes.
Once you’ve sorted your things into their proper groupings, you can gather them up then label each so you see where they are located when the time comes that you need them. This will also help you keep track of whether you need to replenish your supplies.
Depending on the type of containers you’re using, you can write or print out labels on sticker paper so you won’t have to deal with sticky tape, or if your storage device looks like the one above, simply slip the labels inside the metal holders out front.
 |
| Photo by Sophia Y on Unsplash |
3. Make use of available spaces for additional storage.
A workbench is definitely a must-have when setting up your jewelry workshop. More importantly, it must be an adequately-sized one so that there’s space for your actual jewelry making, as well as having a part of it dedicated to storing and displaying your materials and creations.
You need not worry much about this as most workbenches come with drawers and hooks that help make sure your tools are always within your reach while you work. But as demand for your works increases you will find that the space you are occupying may not be enough, hence the need to extend your jewelry display and storage to nearby areas.
One method you could try is to hang up a pegboard on an empty wall like the one on display here. It’s made to hang items like canisters and hooks which you can use as additional display and storage space for your works and supplies.
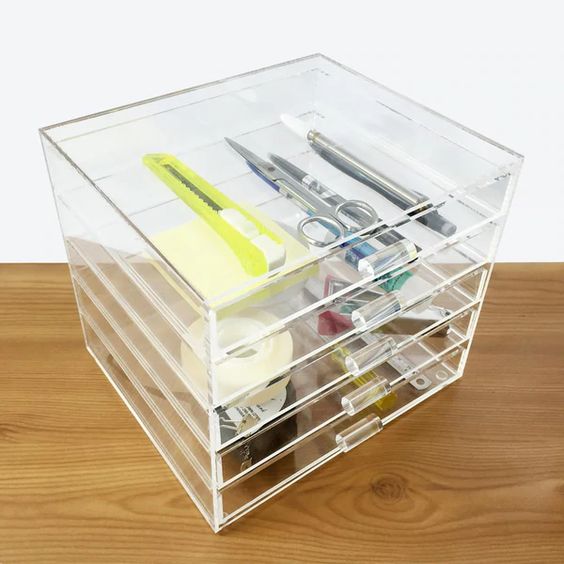 |
| #COM5780C Premium Acrylic 5 Drawer Makeup & Jewelry Organizer* |
4. Choose clear containers for your desktop organizers.
When it comes to choosing which storage devices to display on your workbench, you can’t go wrong with see-through containers. Having your tools within your reach is good, but even better when you can clearly see them from where you’re working. Without making a move, you can quickly scan the drawers for the items you need to get the job done.
 |
| #96-12 Flocked Plastic Tray Insert* |
5. Keep the things inside your drawers organized with a tray insert.
We’ve only talked about how to organize the visible items on your workbench, but what about those that are hidden inside your workspace’s drawers? Because you deal with a lot of tiny items when making jewelry, it’s not a good idea to store them inside drawers as is. You would still want them to stay neat and easy to find when you need them, so we suggest getting compartmentalized tray inserts and using them to contain your jewelry-making supplies.
Keeping items like beads or shells unsorted would be a nightmare once you need to locate and sort them when you start working on a project. You wouldn’t want to begin creating a piece of jewelry with scattered materials, so your best bet is to use these trays with separators inside your tray. For your threads, wires, and cords, you can use trays that have long and rectangular-shaped compartments instead.
6. Remember to always return items to their designated spaces.
Some projects will take a while to complete and that’s okay; what’s not okay is leaving a mess after your work session. It’s so easy for jewelry parts to roll off the workbench or a piece of tool or two to go missing. This is especially possible in homes where kids and pets are around as they will not hesitate to pick up or play with things that they see. Not only will these derail your work progress but is also dangerous as jewelry making often involves working with sharp objects.
To prevent such mishaps from happening, just remember to return everything to their containers. In the case of unfinished jewelry projects, you can always use jewelry display stands and platforms to keep them in place before going back to work on them the next day.
 |
| Photo by laura adai on Unsplash |
7. Have an area in your workspace for things that inspire you.
Now, this advice goes beyond organizing your work tools and supplies—for our last point, let’s talk about how you can organize your mind and get it ready for jewelry making.
Sometimes inspiration strikes you like a lightning bolt, jolting you into a creative frenzy. Unfortunately, that doesn’t always happen but what do you do when demand is piling up and you’re left with zero ideas?
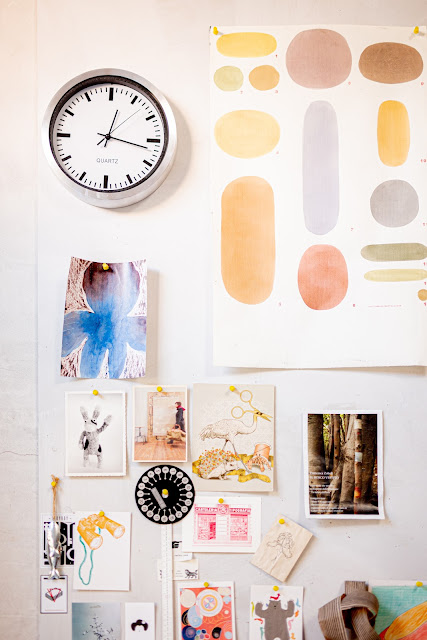
A lot of artists make mood boards which are collections of images, colors, even phrases, or songs that inspire them and drive their creative process. You may benefit from making something for yourself and having it placed in a prominent spot in your workspace to keep you motivated as you work on your jewelry creations.
Just think of objects or aesthetics that you find beautiful and inspiring and start from there. You might just find yourself creating your best work yet.
A good work session always starts with a workspace that’s neat and well-organized. We hope these tips inspire you to create jewelry that will bring your artistry and business to higher heights.
*Available on the Nile Corp website. Accessories not included.





0 comments:
Post a Comment